> ## Documentation Index
> Fetch the complete documentation index at: https://crewai-fix-file-tools-path-allowlist.mintlify.site/llms.txt
> Use this file to discover all available pages before exploring further.
# Crew Studio
> AI 보조, 비주얼 에디터, 통합 테스트로 새로운 자동화를 구축하세요.
## 개요
Crew Studio는 자연어와 시각적 워크플로 에디터로 처음부터 자동화를 만드는 인터랙티브한 AI 보조 작업 공간입니다.
 ## 프롬프트 기반 생성
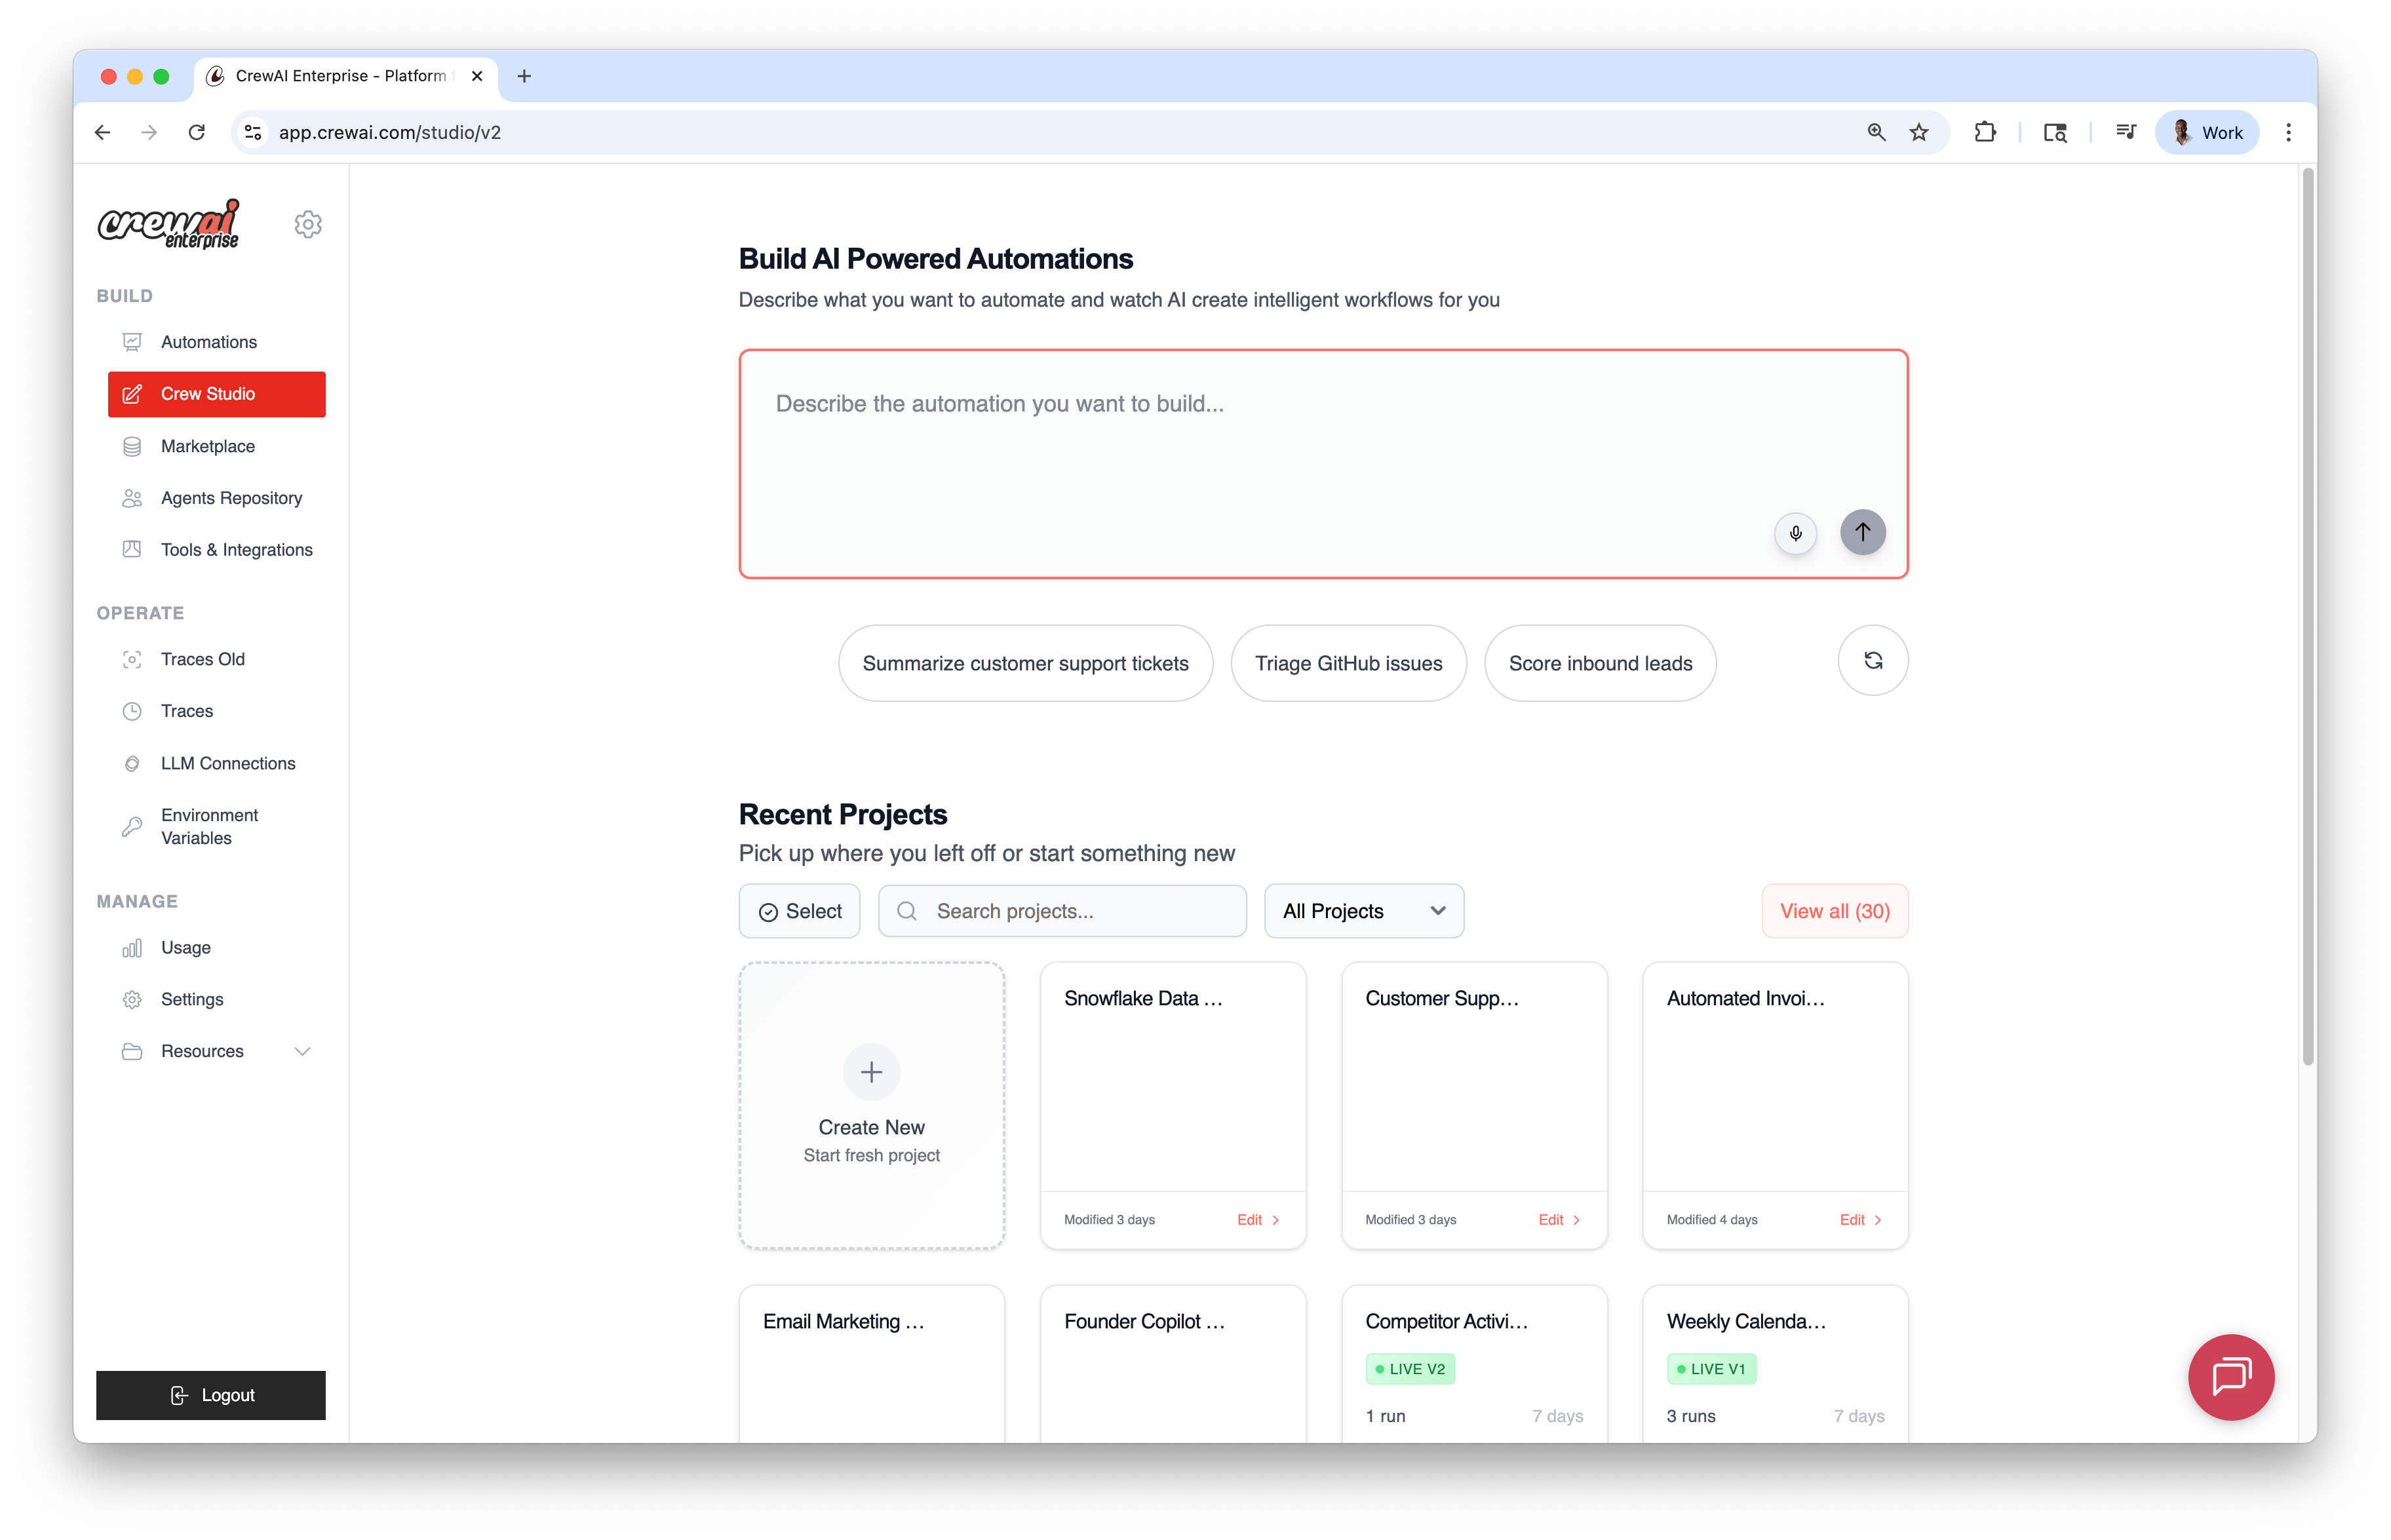
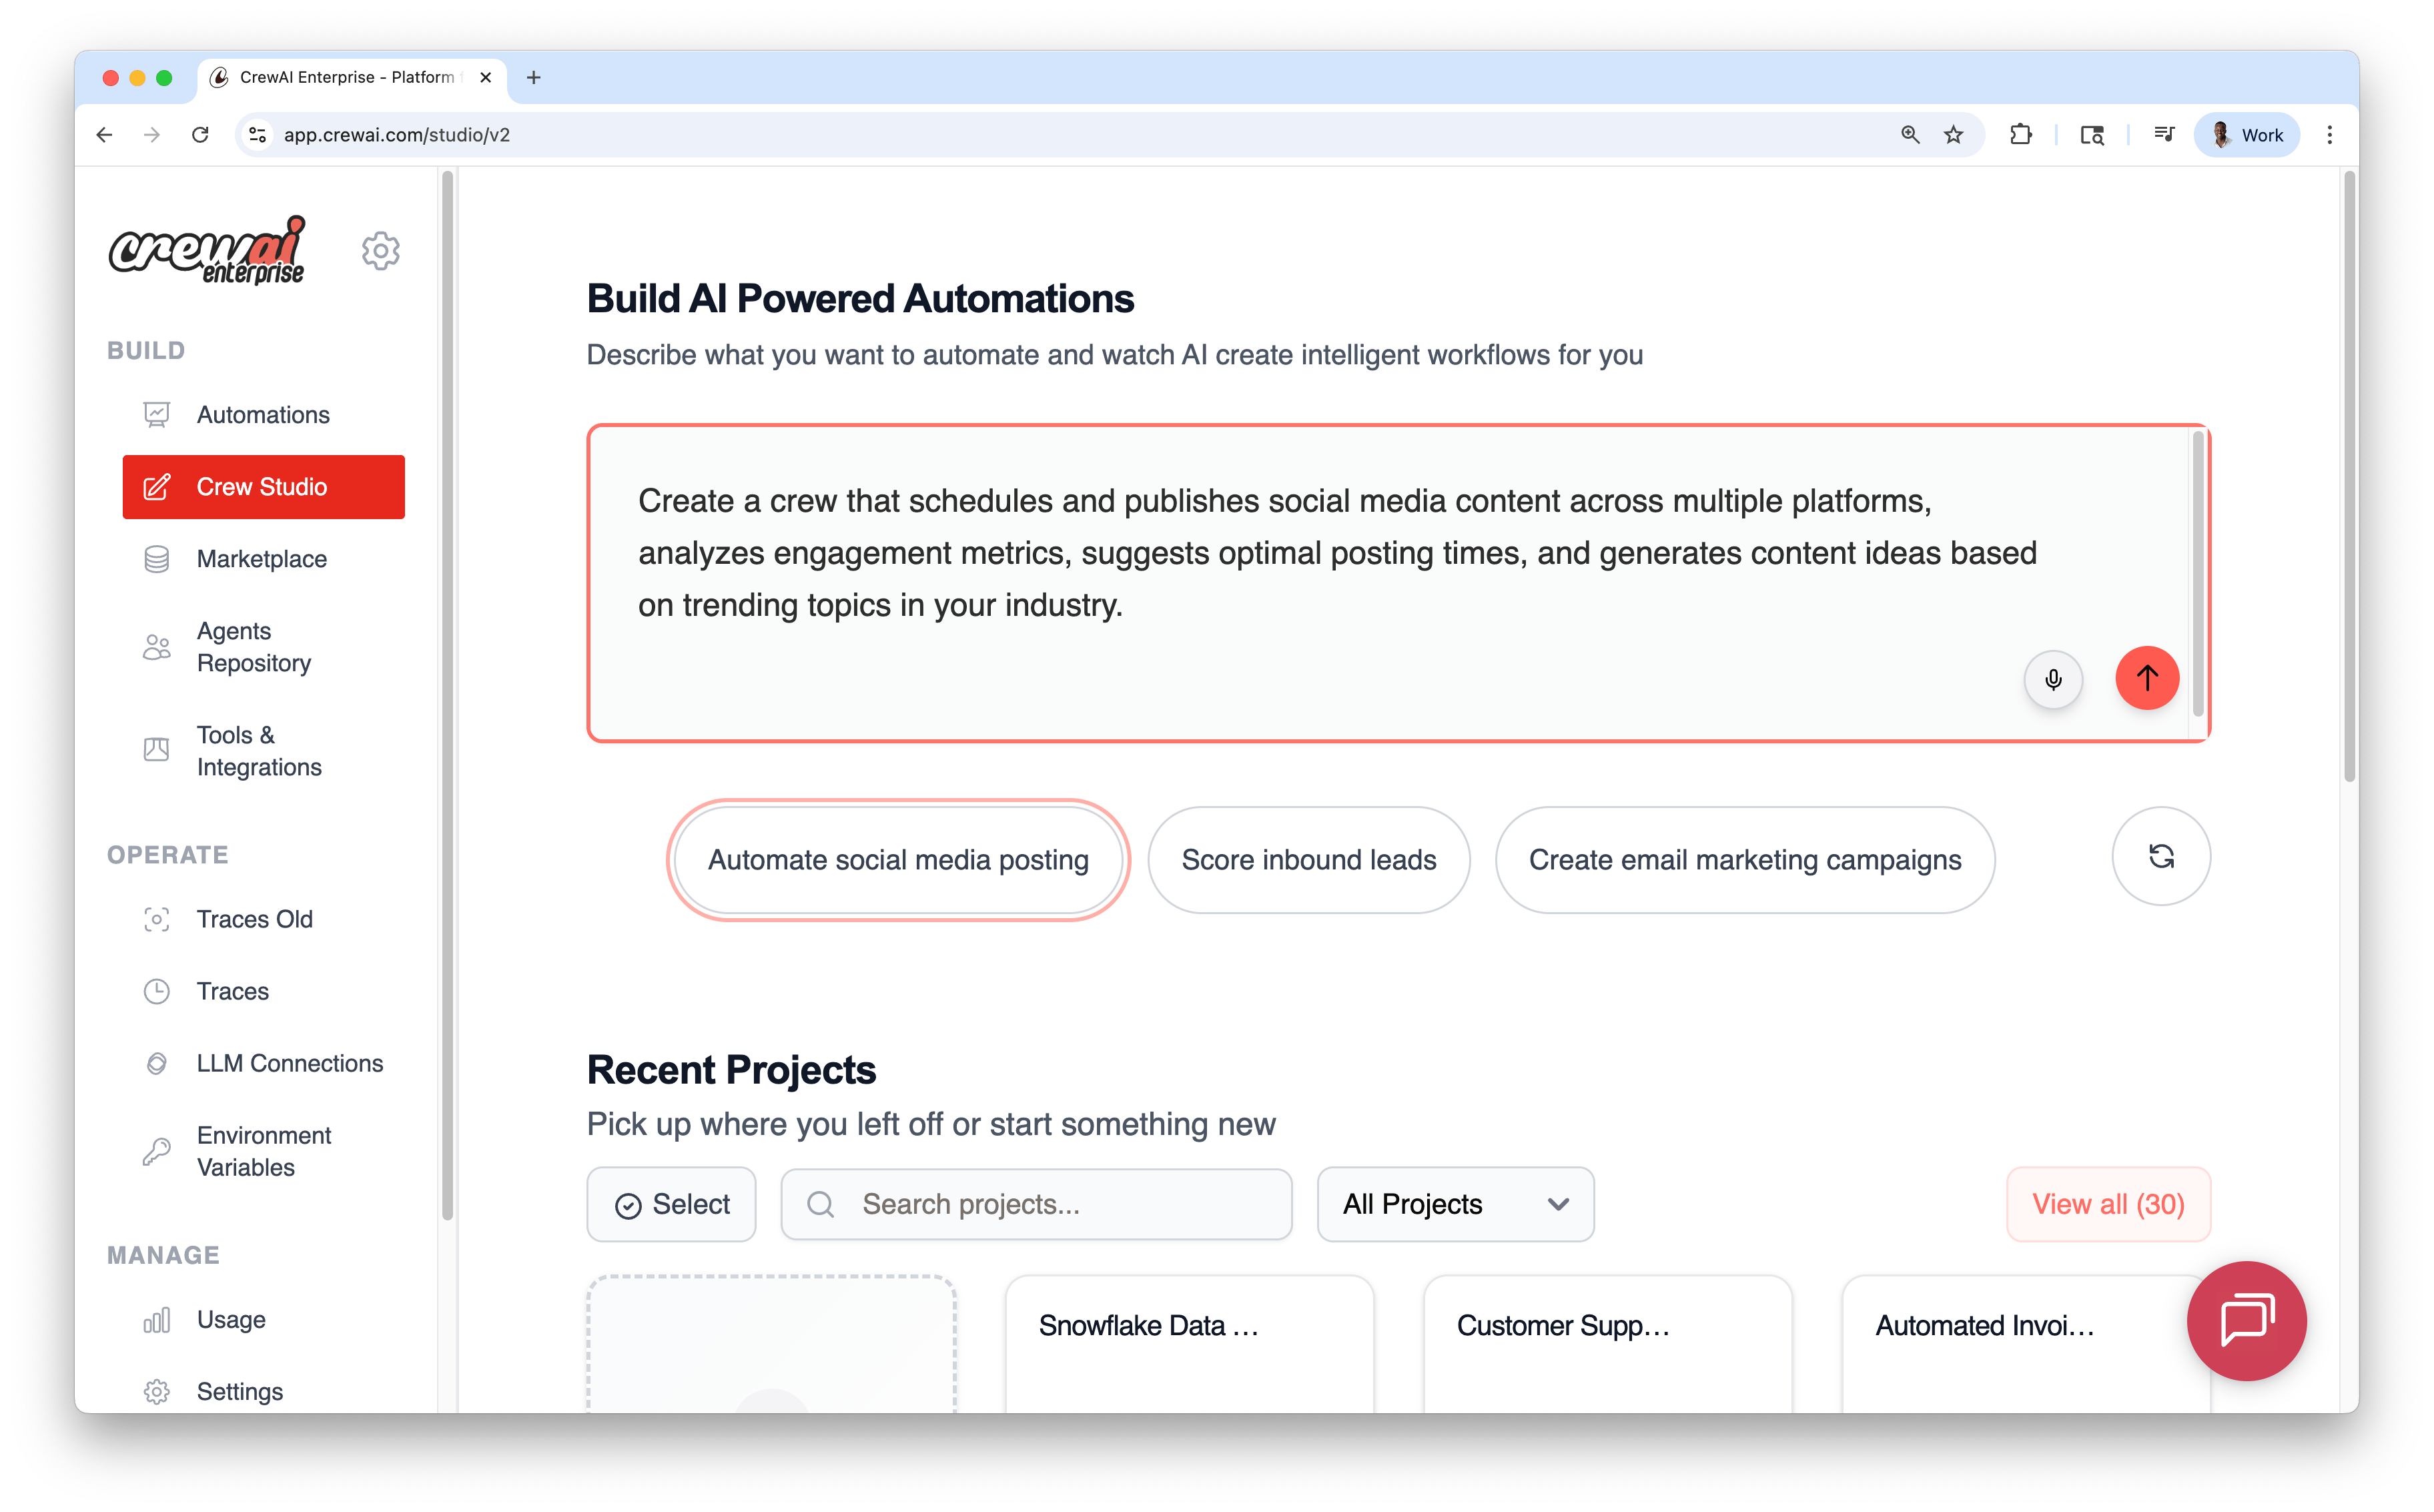
* 원하는 자동화를 설명하면, AI가 에이전트/태스크/도구를 생성합니다.
* 마이크 아이콘으로 음성 입력을 사용할 수 있습니다.
* 공통 사용 사례용 프롬프트 템플릿으로 시작할 수 있습니다.
## 프롬프트 기반 생성
* 원하는 자동화를 설명하면, AI가 에이전트/태스크/도구를 생성합니다.
* 마이크 아이콘으로 음성 입력을 사용할 수 있습니다.
* 공통 사용 사례용 프롬프트 템플릿으로 시작할 수 있습니다.
 ## 비주얼 에디터
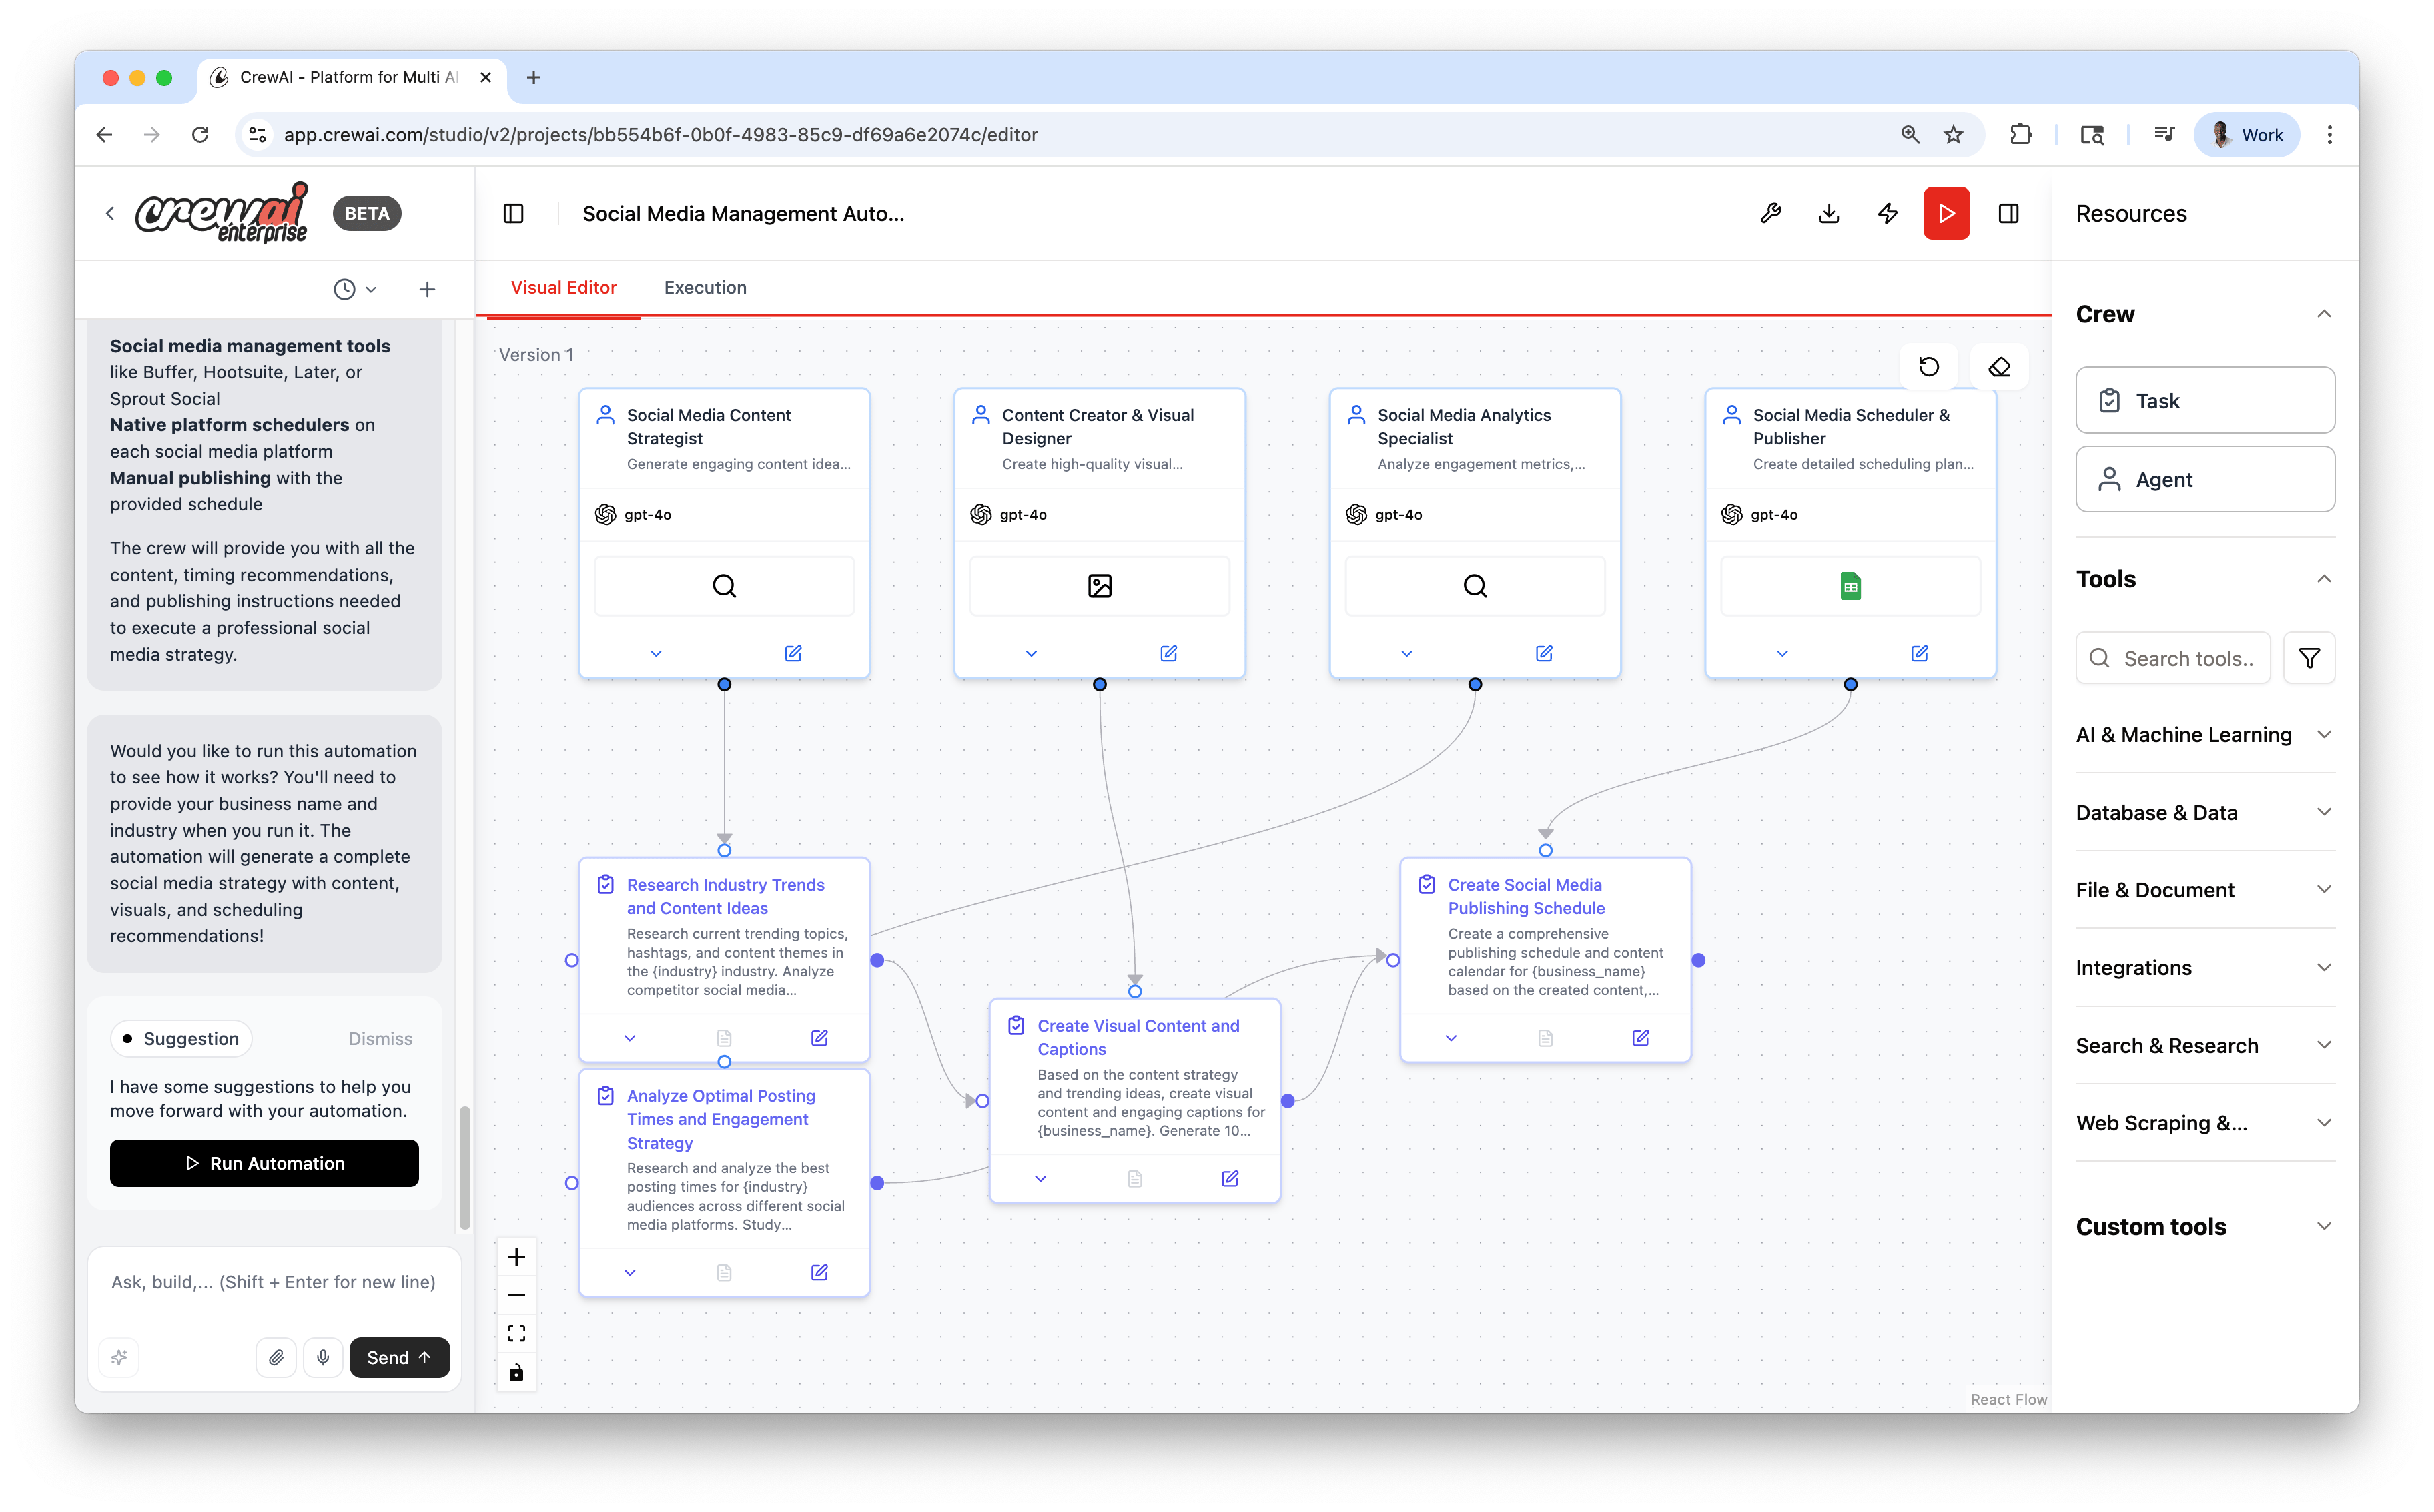
캔버스는 노드/엣지 형태로 플로우를 표현하며, 세 개의 보조 패널로 코드 없이 쉽게 구성할 수 있습니다 (일명 "vibe coding AI Agents"):
* **AI Thoughts (좌측)**: 설계 중 스트리밍 추론
* **Canvas (중앙)**: 에이전트/태스크 노드와 연결
* **Resources (우측)**: 드래그앤드롭 컴포넌트 (에이전트, 태스크, 도구)
드래그앤드롭으로 캔버스를 구성하거나, 채팅 섹션으로 에이전트를 생성할 수 있으며 두 방식은 상태를 공유합니다.
## 비주얼 에디터
캔버스는 노드/엣지 형태로 플로우를 표현하며, 세 개의 보조 패널로 코드 없이 쉽게 구성할 수 있습니다 (일명 "vibe coding AI Agents"):
* **AI Thoughts (좌측)**: 설계 중 스트리밍 추론
* **Canvas (중앙)**: 에이전트/태스크 노드와 연결
* **Resources (우측)**: 드래그앤드롭 컴포넌트 (에이전트, 태스크, 도구)
드래그앤드롭으로 캔버스를 구성하거나, 채팅 섹션으로 에이전트를 생성할 수 있으며 두 방식은 상태를 공유합니다.
 ## 실행 & 디버깅
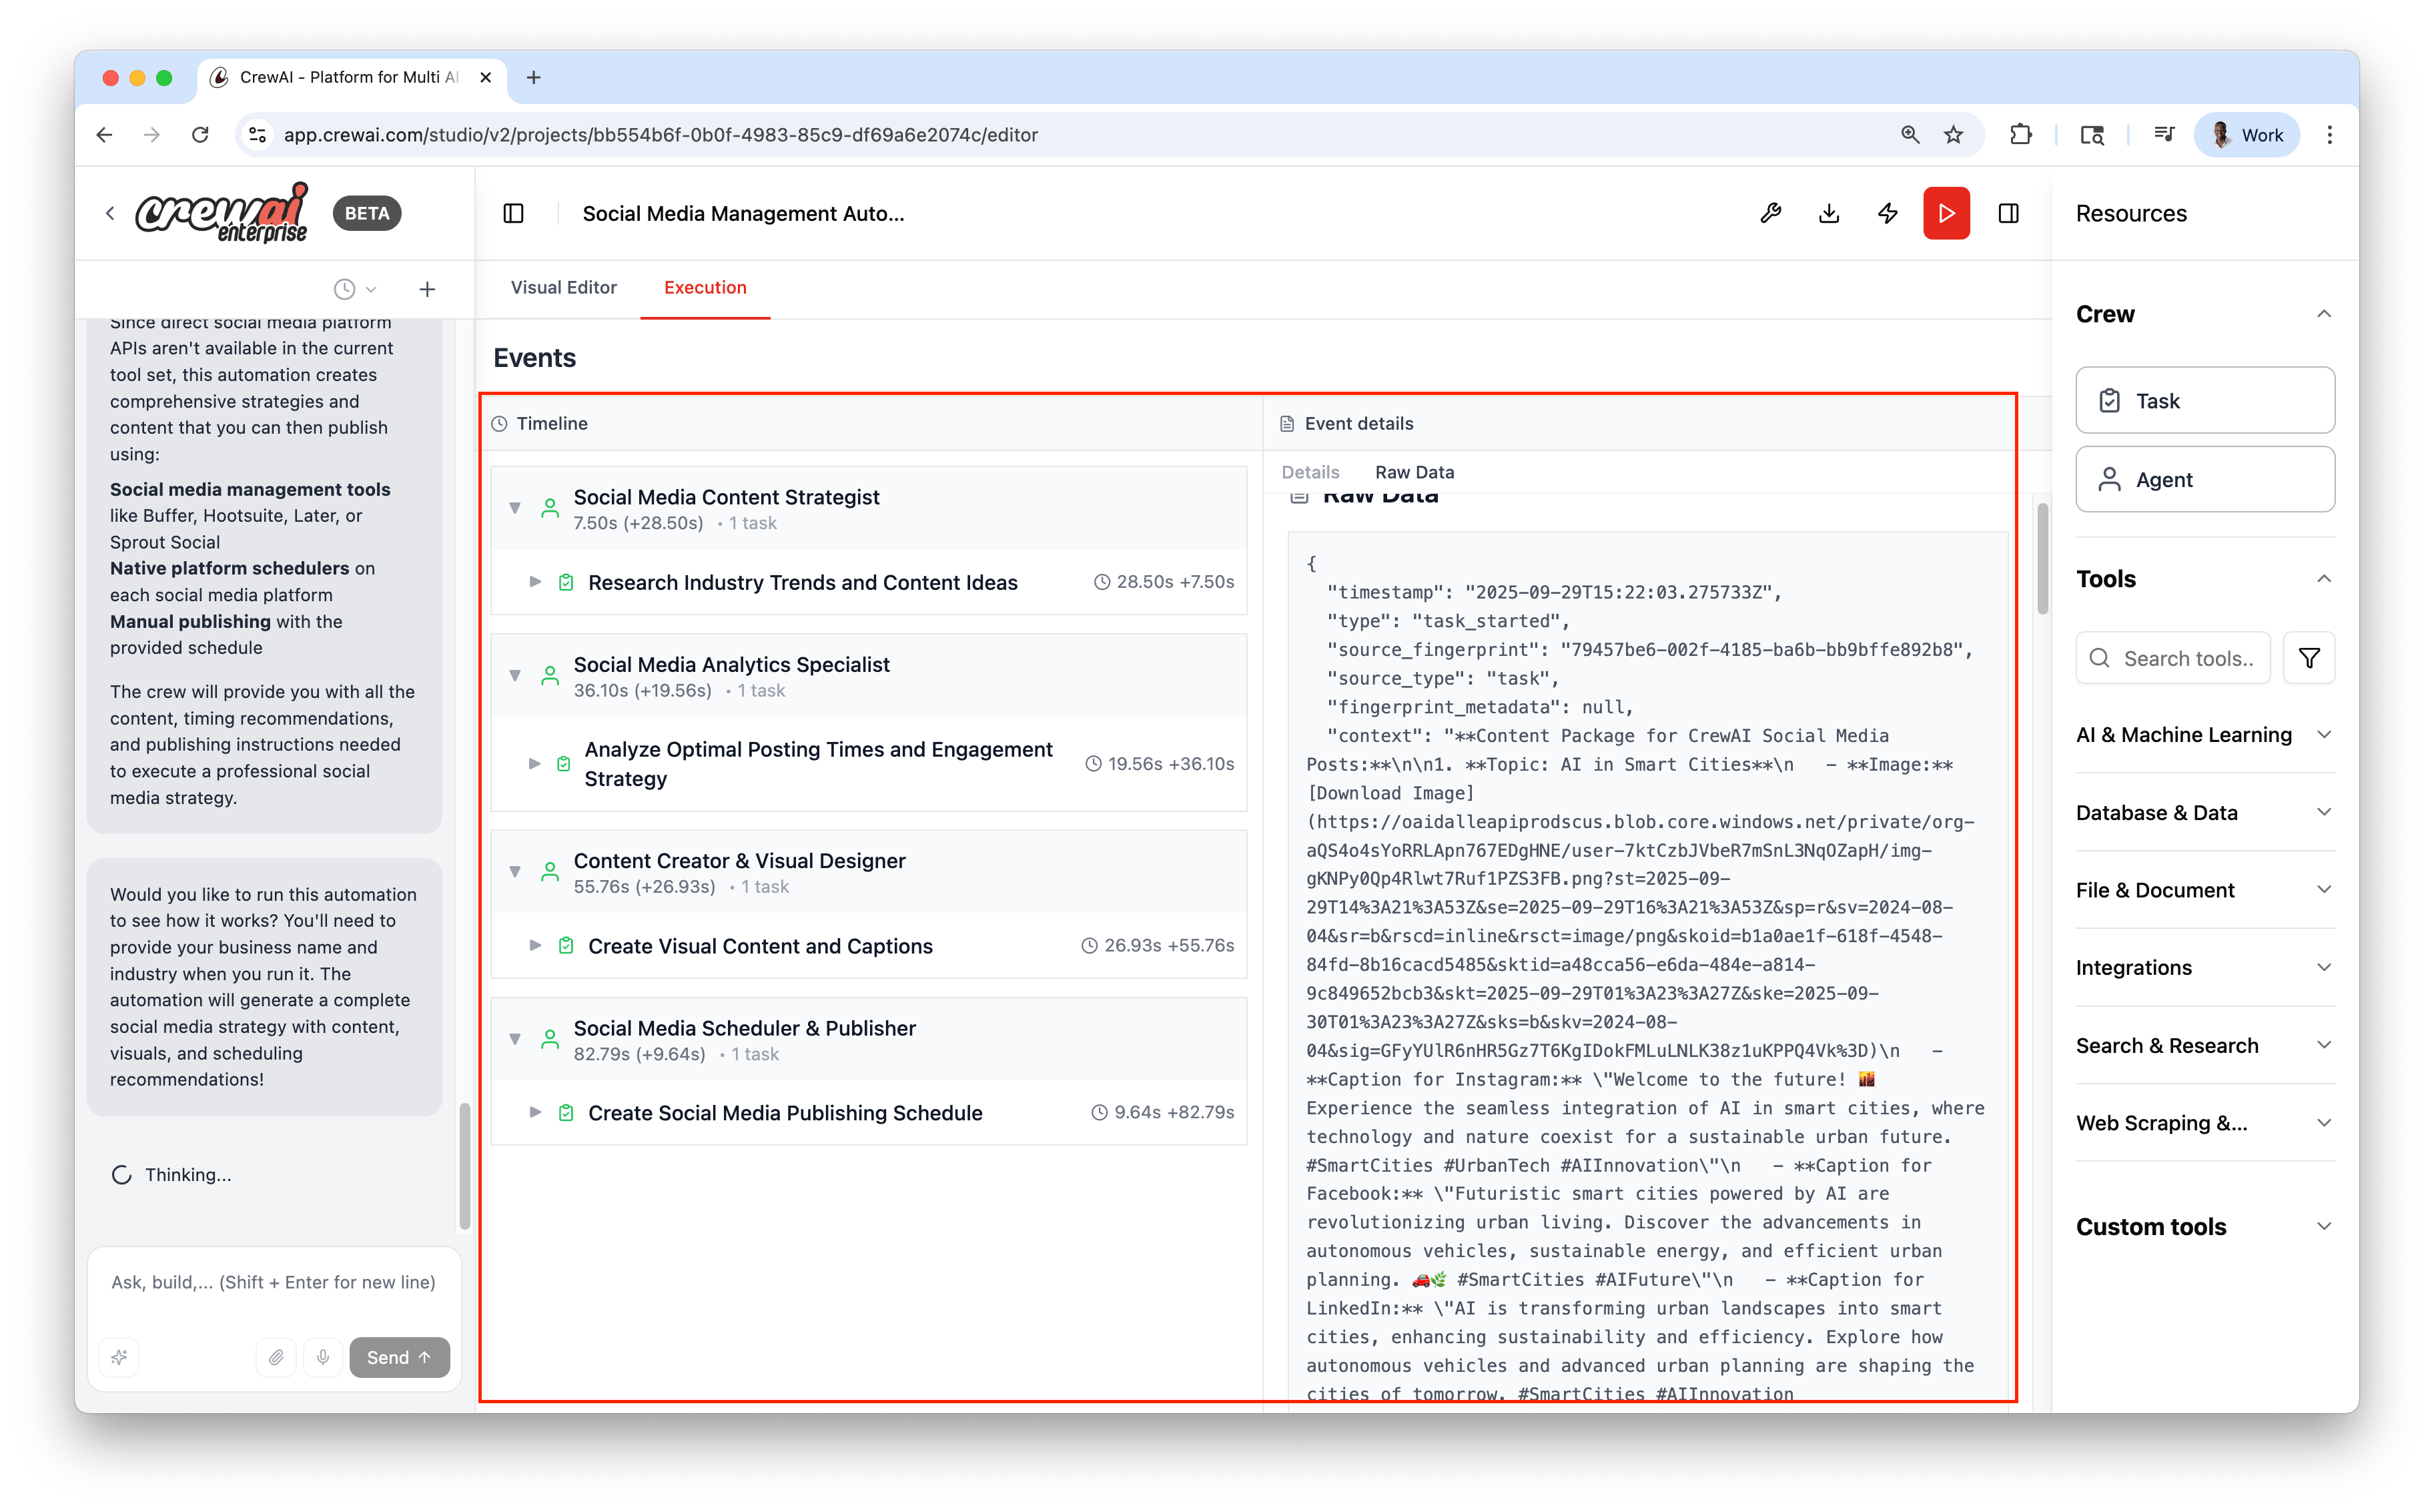
Execution 뷰로 전환하여 실행을 관찰하세요:
* 이벤트 타임라인
* 상세 로그 (Details, Messages, Raw Data)
* 게시 전 로컬 실행
## 실행 & 디버깅
Execution 뷰로 전환하여 실행을 관찰하세요:
* 이벤트 타임라인
* 상세 로그 (Details, Messages, Raw Data)
* 게시 전 로컬 실행
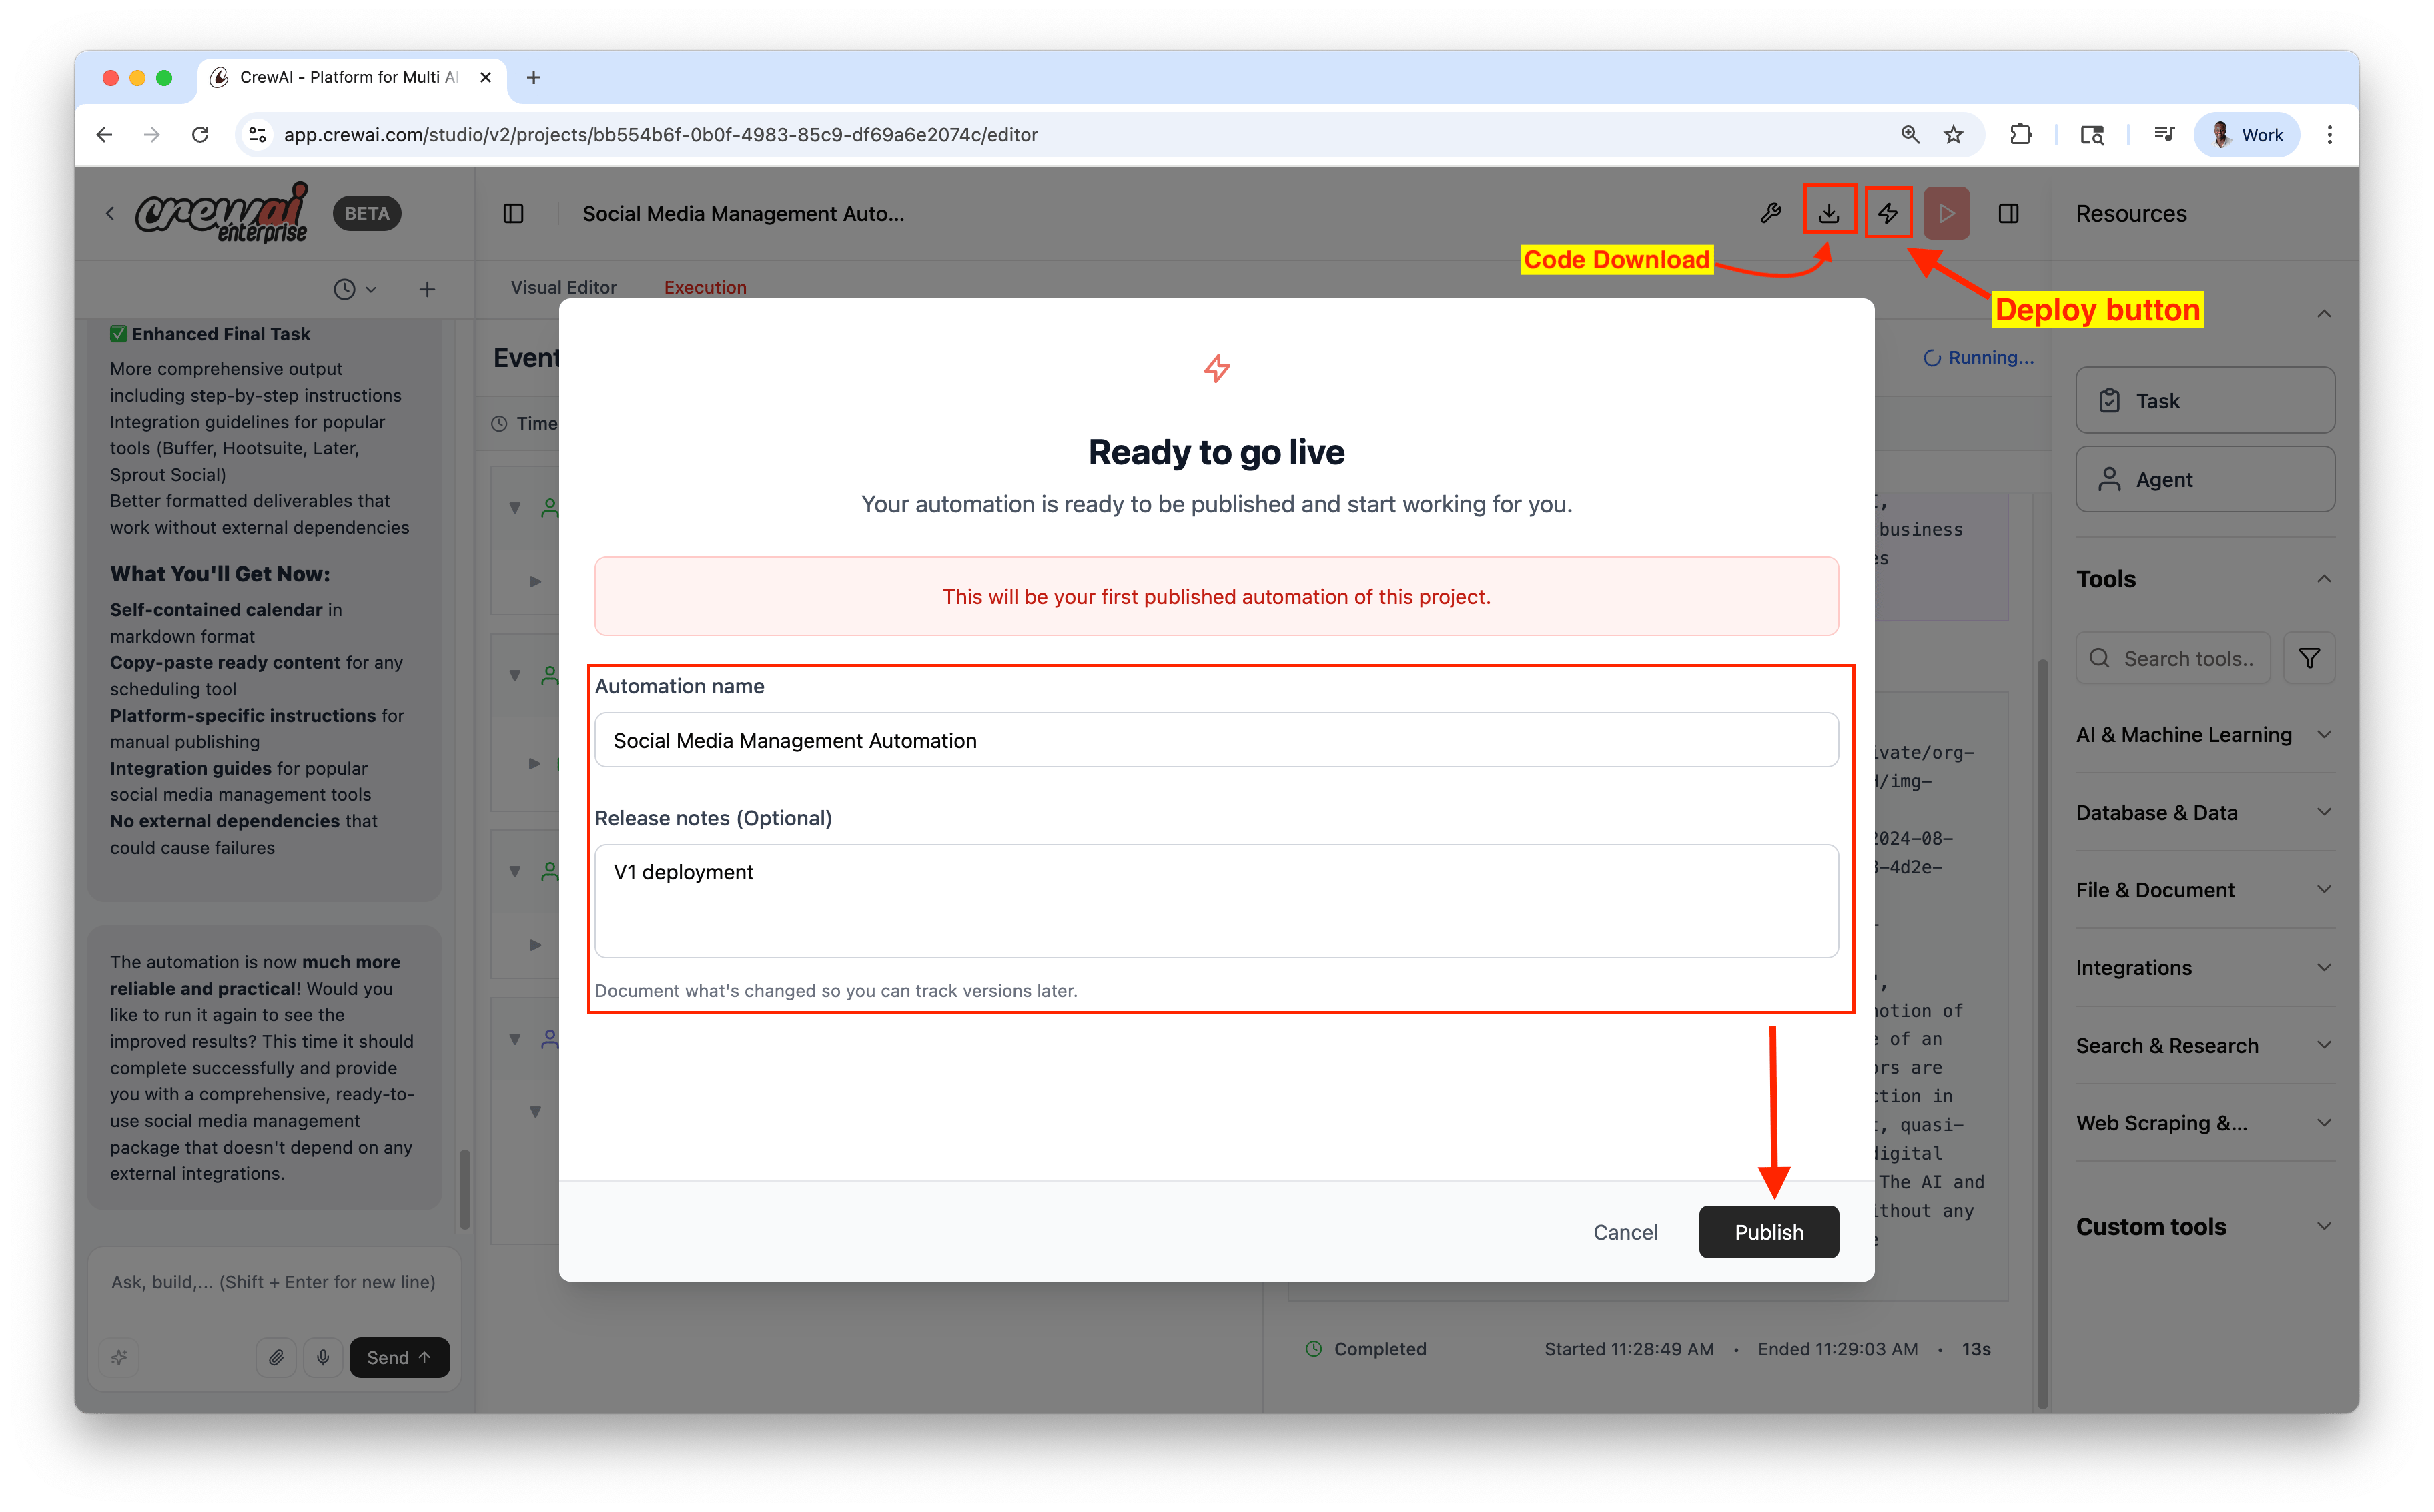
 ## 게시 & 내보내기
* Publish로 라이브 자동화 배포
* Download로 소스 ZIP 다운로드 (로컬 개발용)
## 게시 & 내보내기
* Publish로 라이브 자동화 배포
* Download로 소스 ZIP 다운로드 (로컬 개발용)
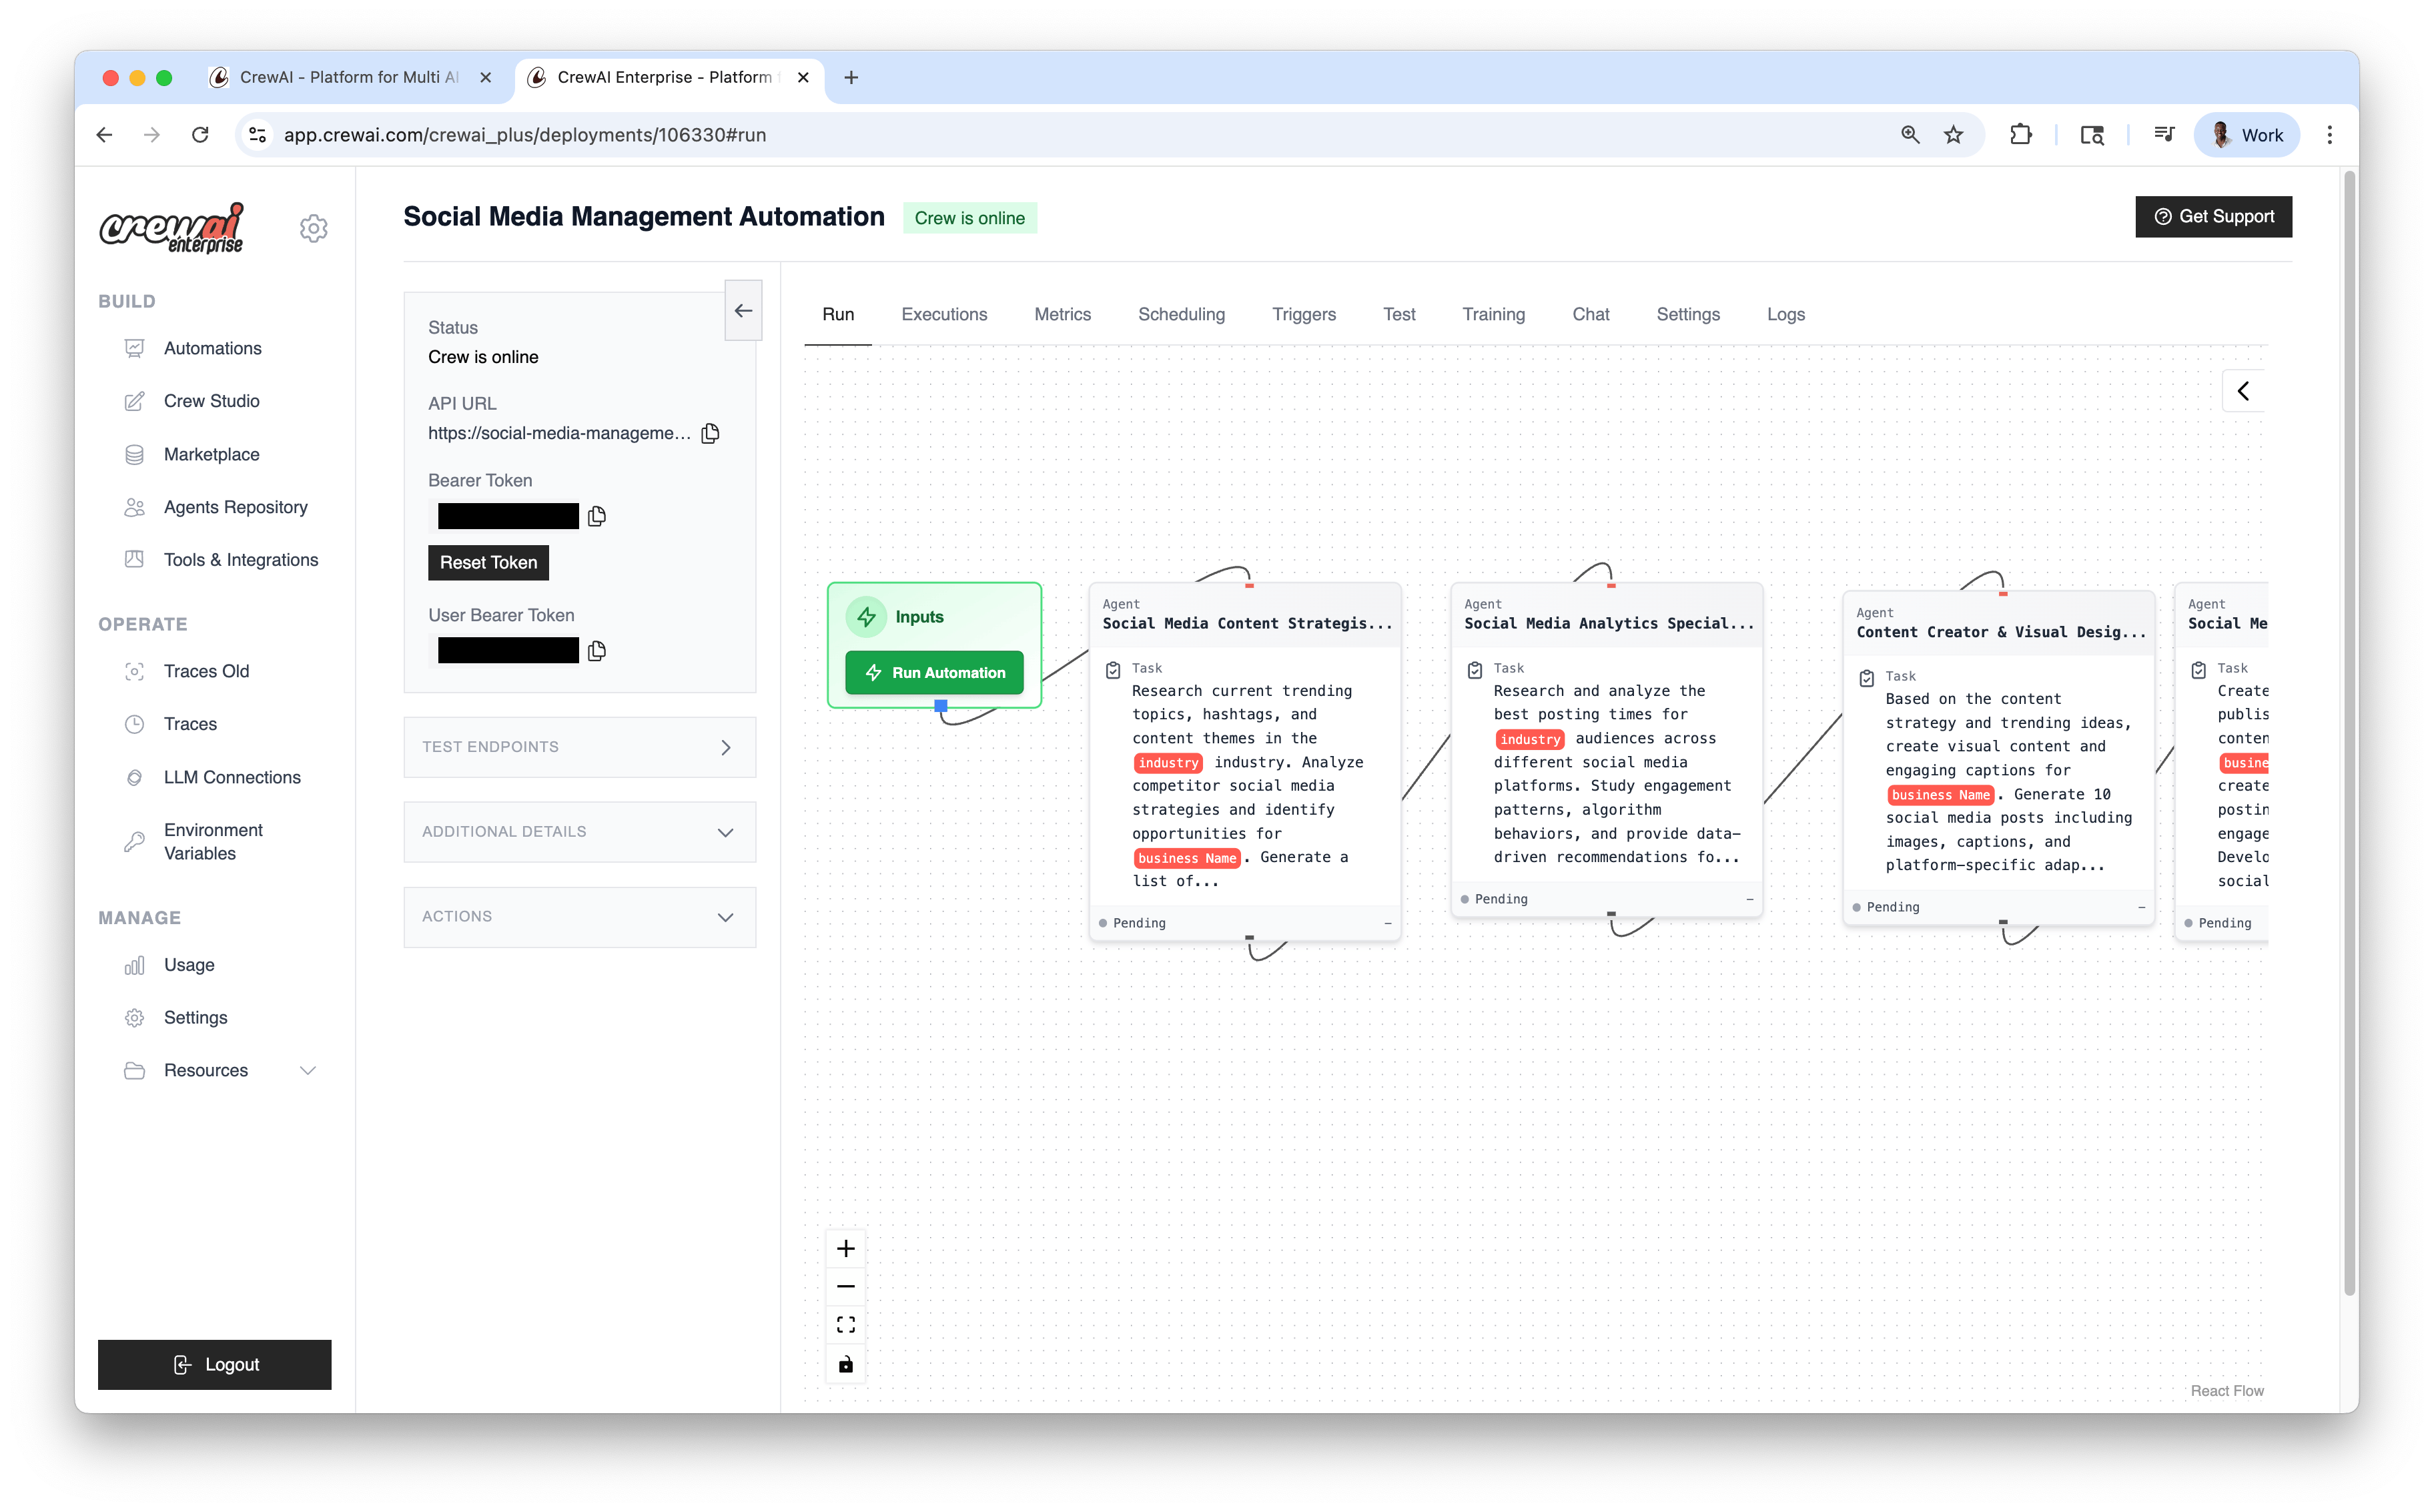
 게시 후 **Options** 드롭다운에서 `chat with this crew`, `Export React Component`, `Export as MCP`를 사용할 수 있습니다.
 ## 모범 사례
* Studio에서 빠르게 반복하고, 안정화 후 게시
* 도구 권한은 최소한으로 제한
* Traces로 동작/성능 검증
## 관련 문서
Crew Studio를 활성화하세요.
크루를 빌드하세요.
GitHub 또는 ZIP 파일로 크루 배포.
React 컴포넌트를 내보내세요.
## 모범 사례
* Studio에서 빠르게 반복하고, 안정화 후 게시
* 도구 권한은 최소한으로 제한
* Traces로 동작/성능 검증
## 관련 문서
Crew Studio를 활성화하세요.
크루를 빌드하세요.
GitHub 또는 ZIP 파일로 크루 배포.
React 컴포넌트를 내보내세요.